NewThoughtLibrary.com
presents New Thought Works from the beginning through tommorrow along with mp3's, eBooks and more...
New Thought Archives New Thought Authors
More New Thought Resources:


You may notice the Library is undergoing extensive upgrades since it was hacked in May 2015 Books can increasingly be read on your phone, and there are more audio downloads so you can listen to the books as well
Sending books to New Thought Library
Today things have evolved quite a bit from the beginning of the library at the end of the 20th Century.
Through the wonderful insights of Avalon and his evolving team of amazing New Thought Leaders around the world, better ways to process New Thought Media including books, then present them for your use are always being developed.
Invitiations to the NewThought.NET/work are extended to compassionate New Thought professionals when we observe higher thinking embodied in compassionate action. The first step to invitation is becoming a Library Patron.
Becoming a patron insures more efficient processing of public domain New Thought media and novel production of digital formats that meet the panoply of public desires for these potent teaching.
Why should we -- you and I -- support the digitization and organization of media around the globe?
We should support the digitization and organization of media because of ongoing challenges facing humanity. We have both human made problems such as violence in various forms, as well as natural disasters such as earthquakes, tornadoes, typhoons and hurricanes. History is replete with incidences of the destruction of valuable scientific and cultural assets by both natural disasters and at the hands of people.
The most notable historical examples of the destruction of libraries are the burnings of the Great Library at Alexandria which occured more than once. Today it is almost inconceivable that the present library in Alexandria could hold all the world's knowledge because the present cultural and sociological condititions in that nation and region preclude the archiving of certain works. This is largely due to the deep influence of Abrahamic religious forms upon the populace in this area. Some Abrahamic people are afraid of sculptures, pictures or other media that depict the human face or form. Other Abrahamic people might feel antagonistic toward art forms such as dance, or theater or any of the dramatic arts. While this may be shocking to people living outside of the Middle East or other sections of the world which are dominated by Abrahamic belief systems, one should never be complacent in believing that violence within one's own society will not be directed at important cultural institutions.
Abrahamics are largely influenced by delusions based upon apocalyptic prophecies common to all Abrahamic belief systems. In the past, Abrahamics have waged war upon each other over differences that are largely indistinguishable to outside parties. Although Abrahamics inherited a monotheistic (belief that there is only one God) from the ancient Egyptians, adherents espouse beliefs in Angels and other energy beings, with a large portion believing in a negative being they call the "Devil".
It should be noted that while most, if not all, Abrahmics claim to follow a compassionate God which they give various names depending on their subgrouping. The compassion of this God does not necessarily extend toward themselves or others. Adherents do not always demonstrate compassionate action and war crimes are common to all Abrahmic groups. Some groups even enshrine war crimes such as rape, slavery and murder within their writings as positive acts. For thousands of years, Abrahmic groups of various types have claimed that such crimes are an exception and against their values, yet without exception every Abrahamic group has committed crimes that many other groups both ancient and contemporary would hesitate to enact.
Even advanced cultures in Europe, North American and Asia have not been immune to destructive acts directed at libraries. The entire world saw the population of China guided to cultural immolation during the Cultural Revolution resulting in the wholesale destruction of priceless Chinese treasures including manuscripts, illustrations, sculptures and more. No country is immune to mass hysteria or delusion.
This is why there is an ongoing and persistent need to digitize and organize media or all kinds.
Even in countries that were formerly considered bastions of Liberty, we have seen book burnings and the negation of human rights. Some would even say that incidents have been increasing over the last 20 years. For instance in the United States during the first decade of the 21st Century, particularly from 2000 to 2008, book burnings occured around the nation. Books burned include: Fiction books such as J.K. Rowling's Harry Potter books, Children's books, and more. Even the U.S. Government has participated in book burning. Some churches promote book burning as part of their traditions. This behavior continues today.
A list of book burning incidents can be read on wikipedia.
It is often pointed out that only the greatest and most important writers are burned. But books may be burned simply because they do not represent the limited view of the person or people burning the books. Burning books in order to destroy knowledge or ideas is a concrete acknowledgment by the perpetrators that they adhere to a weak belief system in the God of their conception can be harmed by alternate media.
Thus one should be aware that that actors perpetrating the destruction of cultural heritage, including books and ancient art are mentally and emotionally ill. If they truly believed in an "all powerful God" they would have no fear of other cultures. Those that destroy past treasures in the name of a future goal are demonstrating that their beliefs are weak and instable.
Strong people of faith, or even strong people who are agnostic or atheist have no fears of what is within a particular book, or library.
A word of caution to those who wish to contend against the deluded. Deluded people are incapable of reason due to the fact that the weakness of their belief systems demands indoctrination. Most of these people need deep and lasting treatment to live successfully within democratic societies. Individuals emerging from decadent societies devoid of human rights often require continuous monitoriing for the duration of their lives. Decadent societies often enshrine rape and child abuse as sacred practices.
Some countries are beginning to "chip" newcomers in order to ensure the safety of existing populaces. Tracking chips are inserted subcutaneously, intramuscularly and in some case intercranially. These chips are increasingly part of penal tracking, as well as an important part of the new immigration systems around the globe. What was once science fiction is now science fact.
Although the insertion of chips can safeguard citizens within advanced democracies, there are some civil rights concerns. However, many of the proponents of this new form of digital tracking claim that it is a necessary part of contemporary immigration system due to terrorists hiding among valid asylum seekers desiring refuge from decadent cultures.
Today some people feel that certain countries that were formerly considered the lighthouses of liberty, freedom and tolerance are now beacons of light warning us of impending fires of hatred which have been sparked by the slumbering sparks of ignorance. The creators of faux history are capable of their deceptions through fostering ignorance via propaganda. These Orwellian leaders are insistent on repeating the lies till one believes them. The antidote to ignorance is knowledge, when we combine knowledge with compassion, we attain wisdom.
Join us to digitize all public domain New Thought texts as well as texts which contribute to deeper scientific and cultural understanding to insure they are preserved throughout the world via the World Wide Web.
We feel that the best way to provide a public library is online with voluntary membership and no tracking cookies so that members of communities who might be persecuted or retaliated against for reading books that are restricted within their cultures or societies will have less to fear from their accessing of our archive of books.
With every new advance in online library science, we absorb these developments and move forward to create a better library. Our library epitomizes an insightful open source approach which ensures that within ten years we will support at least 1 billion people to realize they share the tenets and principles of New Millennial New Thought.
We know that New Thought is unique. New Thought is neither a form of Christianity or any other Abrahamic thought form. This does not preclude the fact that early New Thought History, whether one begins with Anne Hutchinson in the United States, or with Thomas Paine in England is replete with individuals who used quotes from Abrahamic texts to support their beliefs.
Yet we must be aware that the vast amount of adherents to an Abrahamic form of belief system in one way or another would not agree that New Thought is anything but heresy. And the motor of New Thought, the belief and teaching that "as we change our thoughts, we change our lives," is in fact feared by the majority of Abrahamic adherents as the very definition of "apostasy."
Thus although there are some within the New Thought movement who wish for New Thought to be another Abrahamic Thought form, no one of good sense can honestly agree.
New Thought is what it is. There will never be a valid group or high council that can "rule over, or guide" New Thought because this by very definition is orthodoxy and thus old thought.
Thus we include the entire spectrum of New Thought within the library as well as supplemental texts that support our creation of new insights.
Choosing a book ~ scanning the book ~ cropping ~ cleaning ~ zipping the pages ~ sending the book
Choosing / Finding/ Scanning a book to send in to the library
- The book should be in the public domain which means that it should be at least 67 years old for books copyrighted prior to 1976.
- In 2014, books first published prior to 1947 are now in the public domain.
- if in doubt read your government's rules on copyright.
- If you have a book in your own personal library or in the library of your Spiritual Center, that is great!
If you want to find books, that are in the public domain, they are in libraries all over the world.
- Look in your own personal collection of books
- Look in your Spiritual Center Library
- Look in your local Public Library
- Look in your local University Libraries.
- Once you have found a great book.
- Check it out and scan it at home or
- Take your laptop and a scanner to the library!
- Scanning a book is easy.
- Treat the book nicely, do not be rough with the book, avoid damaging old books
- If you are going to physically clean pages by erasing old pencil marks, be careful about what type of eraser you use. You don't want to damage the pages. Be careful when doing any physical page preparations..
- When using a flatbed scanner, you will need to test your first few scans so that you know that the scanner is working properly and make adjustments as to how you are laying the book on the scanner to insure that any particular book is being properly scanned.
- You don't need to smash the books to scan them, find out how far you need to flatten them in order to get a good scan.
- Once you have determined the best way to lay the book on the scanner you can begin.
- One way to scan books is to have a scanner party at which everyone brings their scanner and a laptop and watches a movie.
- You will need to choose a movie that everyone likes.
- Don't serve any greasy food or food which when dropped could damage the books, or scanners.
- Be sure and tell people not to drink over the books they are scanning or this could result in damage to their book or their scanner or laptop.
- Be sure and have everyone check their scanns to make sure they scanned every page of their book when they are done.
Sometimes they might have missed a page and it is easier to add it in then and there to find the book and add it later.
-
- Open each scan / (picture of the page scanned) to insure it was scanned.
- Insure the scan was a good scan. Can you read it? Did you accidently put your hand in the way? Is it straight, clear and readable?
- Now it is time to crop the raw scans into individual pages.
- This can be done with a variety of programs. If you are using a windows machine you can even use the Paint program which is in the Accessories folder of your programs list.
- You will first create a new folder called "bw" in which you can place the cropped single pages.
- Now crop each original scan into two pages, exporting them into your "bw" folder
- After you have insured that each page of the book has its own individual picture, then it is time to check the pages to see if they need any retouching.
Processing / Cleaning up the scans so they can be OCR'd
Over the course of their shelf life, some books may have been marked up or damaged. In the case of personal books, this is a choice of the owner. Books in libraries are supposed to be treated with respect and not marked up by individuals borrowing them. But some people do not know this or do not care about the etiquette regarding borrowing library books. If the book you have scanned has age marks from foxing or deliberate damage from underlining, or other types of abuse before it can be properly run through Optical Character Recognition, the pages must be cleaned.
- Cleaning up the pages by retouching/painting them.
- You clean the pages by painting away the abuse with a color that matches the background of the text.
- Open the page in an image editing program such as Gimp, Paint, Firefox, Photoshop, Paint Shop Pro, etc...
- Select the brush tool, then sample the background, adjust the view so that you can easily see the abuse and the text, then adjust the size of the brush so that you can paint over the abuse without painting the text.
- Fixing up the pages using the cut and paste technique
- In some cases pages have been so abused that it is easier to find the same words on other pages and copy and paste them onto the page that you are cleaning.
- Find the text that you need on another page of the same book, copy the text and paste it onto a separate file by itself so you can adjust it.
- You might need to trim it or use the eraser tool to make parts of it transparent.
- when you are satisfied with the text to be pasted on top of the abused text, then copy it and paste it on top of the old text.
- line up the new text so that it aligns with the old text and be sure that you are using the same word and tense as the word being replaced.
- Fixing up the pages using the typeover technique
- In some cases pages have been so abused that it is easier to simply retype the page.
- In this case, keep the old page, create the new page and save it as a picture in the same format as the old page, usually a jpg, simply add an "a" to the name so that if the old page is named thomas-troward-law-and-the-word-001.jpg, the new page would be named thomas-troward-law-and-the-word-001a.jpg
- Be sure and keep both pages in the folder so that the original page remains part of the folder.
Zipping the pages
Once you have cleaned the pages so they can go through OCR, you can send them to the library. You will need to create a zip folder of the files to send them in.
How to create a compressed (zip) folder using windows
If you want to create a compressed folder within another folder, go to method 1. If you want to create a compressed folder on your desktop, go to method 2.Method 1: Use My Computer to create the compressed folder
these steps to use My Computer to create a compressed folder:- On your desktop, double-click My Computer, and then open the folder in which you want to create the compressed folder. For example, if you want to make a compressed folder in the root folder of drive C, double-click My Computer, and then double-click drive C to open the root folder.
Note If you do not see a My Computer icon on your desktop, click Start, and then click My Computer. - On the File menu, point to New, and then click Compressed (zipped) Folder.
- Type a name for the new compressed folder, and then press ENTER. Your new compressed folder is displayed as a folder icon with a zipper. Depending on which folder options that you have set, a .zip file name extension may also appear.
Method 2: Create the compressed folder on the desktop or in a folder
- Right-click a blank area on the desktop or in an open folder, point to New, and then click Compressed (zipped) Folder.
- Type a name for the new compressed folder, and then press ENTER. Your new compressed folder is displayed as a folder icon with a zipper. Depending on your preferences, a .zip file name extension may also appear.
Sending the files to the library
Give us a call so we can tell you the next step! 505.216.6397
Thank you for your help to make the library, your library the best in the world!FindACenter.com
Discover a rainbow of exciting New Thought Communities around the corner and around the globe.
Find FellowshipDivine Journal
Daily Wisdom from today's New Thought Leaders supports your Spiritual Journey with insights and affirmations.
Daily WisdomNew Thought Talks
Interviews with New Thought Sharers around the world & explorations of current themes in New Thought
New Thought Talks-

NewThought.NET/work
Manifest Your Dreams
Below Creations archived in the library you can now find the processing credits here"Together we make a difference."
Beyond the pages. There are secrets to learn.
"Be in the know. Become a patron."
Register NOW
NewThought.NET/work = the Power of WE -
NewThought.NET/work
Manifest Your Dreams
Below Creations archived in the library you can now find the processing credits hereNew Thought Leaders "are life long learners"
Learn the hidden wisdom.
Library patrons support the library and get first notices and more ...
Register NOW
NewThought.NET/work = the Power of WE
Great New Thought Resources:


A Powerful Collection of Spiritual Resources
We give you a powerful platform upon which to do God's Work learning and sharing New Thought:
DivineJournal.com, NewThoughtCommunity.com, NewThoughtTao.com and many more ...
Use DivineJournal.com to Research, read & write New Thought Texts which you can share through NewThoughtBook.info.
New Thought Resources accessible to anyone in the world with an internet connection.
Find New Thought Communities around the corner & around the world.
FindACenter.com, NewThoughtCentres.com, NewThoughtCenters.com
Celebrating New Thought Diversity in thought and form, we weather all storms, thrive and prosper! NewThoughtDay.com, NewThoughtWeek.com
New Thought Holidays
New Thought Day was declared by James Edgerton on August 23rd, 1915
During research while expanding the free New Thought Library,
one of the ministers came across an interesting quote from early New Thought Alliance President James A. Edgerton:
"'The truth, once announced, has the power not only to renew but to extend itself.
New Thought is universal in its ideals and therefore should be universal in its appeal.
Under the guidance of the spirit, it should grow in good works until it embraces many lands and eventually the whole world.'
~
New Thought Day, August 23rd
, 1915."


NewThought.NET/work Serving New Thought
A growing collection of resources supported by a vast and expanding team of volunteers around the globe.

New Thought Radio
Talks by New Thought Spiritual LeadersUplifting Messages from New Thought Communities around the world.
Listen to New Thought Radio broadcasts from the New Thought Streams PodCast Archive, along with a growing collection of New Thought Music directly from New Thought Artists around the world.
Listen to New Thought Radio 24/7/365
New Thought Day
August 23rd
100 years old
1st declared by James Edgerton in 1915
"'The truth, once announced, has the power not only to renew but to extend itself. New Thought is universal in its ideals and therefore should be universal in its appeal. Under the guidance of the spirit, it should grow in good works until it embraces many lands and eventually the whole world.' ~ James A. Edgerton, New Thought Day, August 23rd, 1915."
New Thought Holidays August 23rd
DivineTao.com ~ since 2003
Be as water, as you are ...The New Thought Tao
Explore the New Thought Tao and discover deeper wisdom. New Thought has many forms, Taoist New Thought brings insights to the table that are not so apparent in Abrahamic forms. While many Abrahamics fight to impose their views on the rest of the world. Taoist New Thought teaches the way of acceptance and understanding. Principles in the New Thought Tao provide powerful processes which serve as keys to deeper happiness and inner peace from the inside out.
Read Divine Tao #8 "Water" Tao #8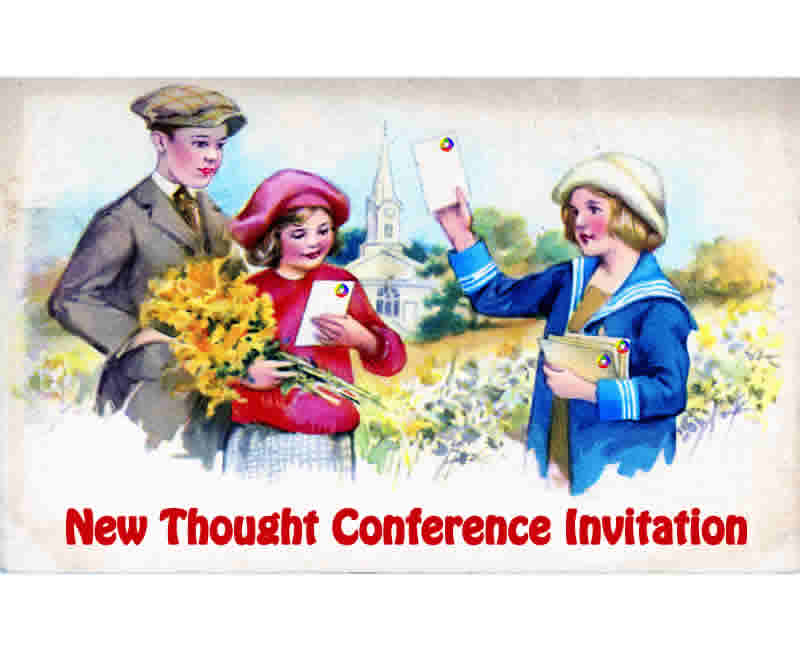
New Thought Conferences
Grow and thrive Share your truthNew Thought conferences from various New Thought denominations and organizations are happening all ove rthe world. Whether Old New Thought or New Thought Today, find conference info about New Thought Conferences!.
New Thought Conferences Share
New Thought Solutions
Conscious Ministry Grow and thrive!New Thought Solutions for New Thought Sharers and New Thought Communities. Empowerment programs that awaken us to the co-creative "Power of We." Grow and thrive sharing a rainbow of New Thought wisdom with the world.
New Thought Solutions Thrive!
Books from contemporary New Thought Writers
NewThoughtBook.infoA growing collection of New Thought books from Today's New Thought Leaders. Many New Thought books lack the marketing necessary to get them in front of you, with New Thought Books INFO those writers to find you and you to find those writers...
New Thought Books Read!